Showing posts with label DIY. Show all posts

Sunday, December 2, 2018

Demolished

A week after we closed, my gal pal Anna rode over to do some measurements and see our place with me. I super, super scooby-doo-ed her into help me investigate where we could demo and then whoops! Into opening up some walls.

We had found a few areas that would make much more sense if we removed walls, and needed to do so for the flooring to be done. We found simple 2x4 framing under plaster boards and a coat of plaster, but no lath. About ten contractor bags full of material came down (not full, Superman had not come along for the day) and we succeeded in opening up the bottom of stairs and half of the wall into second bedroom from living room.

I should explain that the stairs required turning to exit or enter from the kitchen, a place I don't believe extra traffic should be directed. We plan to close this area off and in already the airflow and light is much better in the middle of the house.


Also, the first floor bedroom had a queen bed in it that felt small, and we decided the second bedroom of similar size on the main level would be better used as an extension of the living space. Wanting to increase the cabinetry and use of the kitchen, we needed to fit a dining table in the living space in addition to a family area, and decided that this was a better use of the space than a small bedroom. Could we regret it? Sure, but I don't think we will.

We brought in some young gentlemen friends to help on demo, and they did a great job finishing the space. The guys also helped us move furniture around and pull out carpet/tack strips so the first floor was totally prepped, and to cut and remove the plate for living room wall framing. That process was in no way fast or easy, but at least we know the house is sturdy! We deconstructed the door frames to the stairs and bedroom, and stashed all of the old lumber and trim downstairs for snowy day projects.

It has become apparent to Alex and I that we are not 20 or even 25 anymore in this process. To poor Nyo, that we are not at all interested in her opinions about bacon availability.


Tuesday, November 27, 2018

Finding our floor!

On closing day in our little corner of Michigan, we pulled up the carpet in the hallway and found our heart's desire - the original hardwood flooring. This was a purely investigative measure, and we came back two days later for our first weekend in the house.

In retrospect, the calmest weekend in the house.

Upon arriving, the house was chilly and I turned the heat on and went to work in the smaller bedroom while Alex unloaded the car. He thought this was from excitement, when in reality I wanted to heat up fast while the house warmed up. More on not freezing by the lake, later.

Local waste management asked me to cut the carpet into 4' sections and roll up for when we put out at the curb, or highway, and that worked out to a manageable width for me. The tacks around the edges were the worst in terms of removal, but only took a couple of hours total. Then, I yanked up the hallway laminate, and decided it was a good time to wind down when Alex came in with the last load.

Next morning, I finished the laminate while he sought out coffee and breakfast. The important things in life.

We had an appointment with a local satellite installer to have internet access at home, so I pulled the flooring until he appeared, got him started and then Alex chatted with him about the internet and satellites and gigahertz while I stuffed my face. We ended up needing a business class connection, and can share more about that if anyone else cares, but I have some next-level tech support in-house and really couldn't get anything done without him.

A few spots of water damage showed in the hallway and near edge of kitchen, so we removed a row of tile surgically to see what was under it. I crossed fingers hard that the floor would be salvageable in the kitchen adjacent area. Lunch and a trip to Lowe's began the baseboard trim stripping process, since I don't have enough fun hobbies - but we wanted to see what the existing boards could look like if we got it together.

We sorted the laminate into reusable and waste piles, filled our trash bin with underlayment and some super gross carpet pad, and took off on Monday morning between Alex's calls.

Wednesday, November 14, 2018

A Big Change.

I have failed to write about our home for over a year now. The projects have continued, but we have become busier with work and pet care and generally settling into I guess being adults? Which Alex says we really are and I have to stop calling us non-adults, and he has a point.
Because, we now own a second home.

With Alex working from home primarily, and me working out of our home and around town, we needed a space to go that isn't our workplace. Our condo was a gut rehab, and we have continued to do work to make a better fit for us, but started to find ourselves not wanting to do anything more here because it felt wasteful.

Also, we took a vacation, and when we do that it seems to clarify things for us. 


And anyways, we bought a house in Michigan.


These photos are from the listing, and the exterior is looking a bit frostier these days! 

In the front yard, that tree has dropped a multitude of pears, which we have left for the deer for one last season. One of the funniest things has been seeing our sweet city dogs bolt for the land under the trees to smell whatever has been there eating the pears. 


This little house is about the same square footage as our condo on its two main floors, but also has a nice dry basement we will be using for additional living space. It has three bedrooms, one bath, and the original 1940 kitchen opens to living room - AND we somehow ended up owning over two acres. 


Obviously there are going to be some updates to this home, but the bones of the structure are so, so good and has a lot of original trim, windows, and has been relatively well-maintained. We looked at many houses, and this one was far and away the best fit for us in terms of potential and space. There are such great plans going on for the space and we are excited to nurse the house and property back to health.

For now, our time involves finding something to eat, wandering around a bit for supplies and figuring out our surroundings, and sleeping hard after a day of projects. Oh, and giggling at Shadow in her sweaters now that the weather has turned.


Thursday, January 12, 2017

Bed of Storage

The first month we lived in our home, Alex built a king-sized bed frame for our room. We had decided to downsize during the move, using our previous bed in the guest room and buying a king bed for our room to accommodate two cats and a dog.  (Little did we know, the occupants would soon include another 40 pound girl!)  For reference, the mattress was from Tuft & Needle, and we have loved it - although I think my hip issues may have escalated with my side sleeping on the extremely soft surface!

This worked well, but as we settled in, we realized that more storage would be needed. I went through several design options with my shop supervisor and we decided on a simple pair of frames with deep drawers.

Using 3/4" plywood cut into ~24" widths at the lumberyard (two from each 4x8 sheet of plywood), we cut two boards to length for each side of our bed, then three dividers and two ends from ~16" widths (three from each sheet). We used L brackets to hold the frames together and to support each of the interior dividers. These guys were heavy just as boards, so when the frames were built, they were solid. They lived in the "walkway" of our room for about a week while we plotted the next step.

The support system Alex had built on the original bed included a 2x4 frame, similar to an interior wall.  The 2x4s were covered by 1x8 boards, and the legs were made out of additional appearance boards of narrower widths.  We decided to reuse some of the previous materials in building the frame for the center of the drawers.  Two of the boards were cut down to the length of the frame and anchored to the backs of the dividers and end frames, ~ 1-1/2" below the top surface.  Additional boards were cut down to the right length for our mattress to fit across on top of the "slats" resting on the ledger boards.  At the head and foot, the slats were secured into the two sides for safety.

This was also the day we started painting our room! It only made sense for the bed to be pulled out from the wall before assembly, and we took this opportunity to clean really well behind the headboard as we were not clear how easily we would be able to remove it. Thus far, that has not been my burning desire.  We finished the painting the following weekend, and it has been one of our favorite decisions so far in this home.


We found that the drawer frames could be used as cubbies while the drawers and trim pieces were addressed.  Andy and I cut down some underlayment, previously used on the slatted frame, to use as backing for the drawer cubbies, and I crawled under and hammered them in.

This winter when we pulled out our warmer clothes and outerwear, I strategized putting summer things away under the bed as we only need to access those twice a year for the changeover and it should be as easy as possible instead of my ear warmers being MIA into November...  The clear bins we use for clothing storage fit under the bed with a little breathing room, and I also stashed our summer comforter and pillows in space bags there as well near the opening for easier access.


Tuesday, January 10, 2017

Need a seat?

After a year of living in our home, we decided to add some storage and seating to our living room with a window seat.

The bay window in our space has some unique angles but the windows themselves are beautifully symmetrical, and we found ourselves drawn to sitting in the area.  We had tried a chair and small bench in the window area, which did not fully utilize it, flipped the room arrangement around for the love seat to fit on the shorter wall but block the light, and finally decided to take the plunge and build a permanent seat in the living and family space.


Our first phase was deconstruction and framing. Our friend Andy helped in this part and also in cutting a number of the lumber pieces so that framing came together quickly.  We removed baseboard trim around the windows so that 2x4s could be anchored directly into the studs the entire height of the seat.  

We marked the studs and used 2-1/2" nails for attaching pieces and to the walls.  When the entire surface was framed, we used 3/4" birch plywood for the base, then attached additional risers to the studs and framed out the top as well.  We used 1x4 appearance boards for the facing and Alex built up blocks inside of the cabinet to the correct height for the drawer slides to fit over the front baseboard, then I left him to the drawer devices.

Tuesday, April 26, 2016

Grout is the worst

If we had chosen our floors, I'm not sure white tile would have made the list in our kitchen. Possibly bathrooms, but with the amount of food we have flying around here on a given day, it's hard to keep the floor looking even halfway decent.  It's pretty easy to clean tile - we have some squirt and mop products and of course a real, thorough mopping is excellent for most spills.


The tradeoff for the easy care of tile is of course its grout.  Which is the worst for many of us who are bothered by the feeling of crud, or, who live in our kitchens.  I've tried a few different cleaners of varying degrees of chemical-inclusion, and they don't make me feel warm and fuzzy inside, or in my nose, which makes me very worried for our furry girls whose insides and noses never leave and might eat something from the floor.  

Not too long ago, I found a suggestion to clean the floors with baking soda and vinegar.  No way! I thought, that's like PG-rated cleaning and these floors are not in good shape.  But then I read it again, and the poster didn't seem to be a liar, as in, she had photos to back her claim up.  So, one night, after poor Alex had sacked out, I decided to give it a go.


I sprinkled baking soda around the edges of six tiles.  The first round, I definitely overdid it, just a light covering should do it.  Then, I busted out my trusty spray bottle of white vinegar (not the cleaning kind - I feel like the edible amount of acidity is sufficient, and then can always use from the same gallon if needed), and spritzed the grout lines with vinegar.

After the very therapeutic fizzling sounds, that at least made me feel like I was doing something, I scrubbed at the joints with a grout brush.  We bought one at Target for six or seven dollars when we first moved into our last apartment and realized the water was going to leave orange stains on the white shower grout forever.


It is officially paying off, because I was able to scrub a good bit of the dirt out of our kitchen floor, rinsing the brush out periodically.  After hitting all of the tile edges, I wiped the excess baking soda into a pile in the middle of one of the tiles, and spritzed with another round of vinegar.  It would probably have been more effective to use less baking powder from the get-go, and do a couple of rounds of this.  I scrubbed down the edges one last time, and left the floor to dry to see how it looked in the morning.

I also thought it best to stop loudly scrubbing our kitchen floor, unless I wanted to write a very short follow-up post on how to make your husband ready to throw things at you because he ran around and did errands all Saturday and was exhausted while you HAD to clean something you'd lived with for over nine months.  Even just that night, the difference between the cleaned tiles and unaddressed ones was pretty apparent.

By the light of day, the difference was real, and I got to the rest of the floor over my "break" from classes.  One night, I looked at Alex and said, I need to have fun again.  I am sure he thought I was batty the next day when I'd done this (you know, as a really bizarre version of "fun"), but it felt like we might not have food crud everywhere now.  This was a fantastic opportunity to scrub the difficult spots and around the edges of our kitchen under cabinets and appliances, and also the day my painting pants died of strain.  Sigh.


When I'd finished, there was a baking soda haze all over the floor, and I let that dry and played elsewhere.  After our bedtime cat overlord feeding, I gave the tile a quick clean with hot water and a fresh mophead, and called it good enough for the day.  When we get the kitchen put away, I'll give another good mop to it and be fortified by success, ready to return to the cabinets (you know, sitting around since December....).  Also, now that the caulk is happy in the bathroom, I guess the floor looks pretty awful...

Friday, April 8, 2016

The Ugly


Well, it's not always sunshine and roses and happy midnight paint parties here.  Sometimes, nasty projects like replacing the old dried caulk need to happen.  This is the story of how much I hate that.  The opposite of a love story.

While working on the kitchen, removing caulk from around the countertop and sink was a fun Friday night that Alex hung out with some friends, and I was totally fine with that.  It was at a comfortable height and the surfaces involved were a single slab of granite and drywall. So much easier. I found a product made by the folks of Goo Gone that is a caulk remover.  It is not extremely noxious, and not evil to the planet, and Nyobi and I found it at our hardware store for less than $10.  For three rooms that have plumbing, that's fine. It was best suited to the dried up seals around the sink and faucet, so definitely paid off.

The bathroom project was made apparent to me while I sat on the floor to paint the cabinet, and realized that the seams between the floor tile and cove-shaped baseboard tiles were caulked and it was not looking nice.  It was also a great time to observe that the flippers had painted the grout on top of the baseboard tiles gray, sloppily, as well as everything else in this place, and ratcheted up addressing this highly important area of our home as quickly as possible.  Studying, who needs that?

Once physically loosened, the GG made the work easier and has actually cleaned up some spots I have been unable to address on our floor since moving in.  Um, what was going on in here anyways?  I also bought a tool for this purpose, but was unable to find it because we live in a high-traffic, low sense of putting things away home/work environment.  I did find it and will be able to use it for the guest bath, which is on the caulk radar for sure.

So, a tool like a utility knife, with a nice sharp blade, and a "scraper", or razor blade housing, is the best friend for a project like this.  If it's possible, give a good slice to both edges of the existing caulk line with the knife.  See if it can be pulled out at all.  After you have pulled out 2" of caulk, usually all that behaves at once, you can use the razor blade to scrape the tile surface and remove the remnants from both sides of the joint.  It will be so fun.  You will be so happy you decided to do this. 

The GG spray can come in when you have caulk that does not want to be cut loose from its surface because it has dried up and is awful, and you can let it work for a bit then repeat with the razor blade. You will want to have more than one razor blade, and also the removal tool has a hook on one side to pull down, through, and away from the joint.  Over two afternoons (and evenings...), I removed from the three walls, the sink, the toilet, and also the edge of our bathtub.  Also I hate our bathtub, and that it had so much caulk on it for a reason I do not understand.  It's important after removal to clean the surface thoroughly, and walk away and let it dry fully and get your irritation under control.

If a large part of why you're redoing the caulk is that you cannot stand the current hodgepodge of colors and attention to detail, you need to do these things right or you are no better than the last.  I am not at all convinced anyone else will notice these things, but that's not the point - agewise, it's time to be done in a best case scenario, and I am not certain of the quality of the original job anyways.

In a very, very short summary of what to look for in caulk, there are silicone based ones, latex based ones, and mixtures of the two.  Silicone should be used in areas that would receive lots of water, latex ones should not.  We cannot have too many products floating around, so have limited myself to a clear silicone and a white latex. The latex is paintable so I have used it in areas like where the counter meets the painted wall in the kitchen, where we shouldn't have liquid but probably will because I cook like a crazy person.  There are cheap versions and good versions.  For how awful this process is, I, and many men on youtube, think you should get the antimicrobial one that is supposed to last ten years.  It may not, but the longest time you can possibly get out of this endeavor should be your goal. For the kitchen and bathroom sinks and our toilets, I chose a clear silicone that is going to be the death of any moisture trying to find a new home under our home.  If you are doing painting projects, there is a much less expensive latex caulk available, and we can talk about that when I am doing one of those projects.

There are a number of tools and contraptions that can be used to help smooth the "bead" of caulk, and I am not an expert or anyone who has done this in a paid environment, but I think they're only useful so far.  The best trick I have learned/seen is to use painter's tape, blue or green or whatever color of the rainbow you love and don't care about, and to create a guide for the caulk with two sides.  It is important to take care to not make this too wide, and my method is not great because I end up letting it dry and repeating the process multiple times because I am afraid to screw it up with too much caulk.  After a short dry, you can wipe up the excess not in the joint with a wet sponge, or use your finger dipped in water to smooth the line.  If there are gaps, I would rather go back and fix them after a bit of drying when the tape has been removed, but you are your own person and I am a fussy girl.

Or sometimes, I want it to be done before I go out of town, and bang out two walls so Alex could theoretically resume showering in here if he chooses.

If you made it to the end, I reward you with a silly cat picture.  In a poll of our readers, exactly one person expressed an interest in more cat pictures.  It was myself.

Tuesday, February 2, 2016

Dining Room Wall Shelving

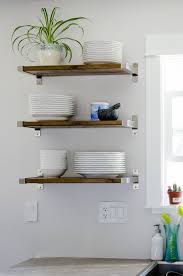
When we decided to straighten out the dining room, we found a number of options available.  Brackets like these are very popular around the internet, but I don't like the shiny, angular metal for some reason and resisted it.

I fell pretty hard for some aged metal brackets from Anthropologie and Rejuvenation (left), then realized we would need a small fortune to support the length of shelves we were looking to add.  By the time we really researched these, some birch boards were already living in our home and we've chosen to let them hang out rent-free until they can find a job.  We also purchased some metal L-brackets at one point that I planned to paint and then backed away from because it's not possible to buy spray paint in the City of Chicago, (thanks Obama! err, graffiti artists) so would have to trek out to a suburb, the Rustoleum paint we could find was not my real choice of color, oh and I realized I just didn't want to do it.

In the midst of the searches, something clicked and I remembered a project I had seen on a blog we were happy to find this year.  The genius DIY folks at Yellow Brick Home built super sturdy shelves for tool storage, basically 500% heavier than what we would be putting on dining room shelving (and also very similar to our bed frame) so we adapted their plans to our needs.  You should really look at their project for proper instructions, I am nowhere near as exact in this process as I should be.

They used 2x4s to create a frame to fit inside workroom, anchored the frame into the wall studs on three sides, covered both sides of the shelves in plywood and added a face to the front surface, and finished them.  We had only one corner to work with, but significantly smaller scale items, so used 2x2s for framing, anchored into the long wall's studs and used the perpendicular wall for a bit of added support, and framed with some birch that was hanging out unemployed.  We planned it! No, sometimes it just seems like it though.


So everyone knows, we do lots of our work at night when we are supposed to be enjoying our 20s young adulthood.  The entire wall was 8 feet, so we decided to build shelves that were 7 feet long and roughly 8 inches deep.  The first shelf's frame portion was actually cut and built the same night the desk was anti-frankensteined and Alex put it up while I made food a thing.  If you spy, with your little eye, a different looking thermostat, you get a prize! And so did we.  The joy of properly managing our heat.  More on that later.


The following night, Alex was a total genius and used the first existing frame as a ledge to cut down the remaining studs.  #smallhomeproblems We used the remainder of the length and some scraps to cut off additional supports, slightly less than 5 inches each.  Our drill/driver has two rechargeable batteries, but due to the heavy ineffective use by his wingman, we had to call it to charge them and leave the project for a third evening.

Sweet Alex was kind enough to pick work on this back up while I stayed out and about with my dear friend Abbie for birthday lunch and drinks and general Andersonville-ing until 630 (after sponsoring a mini-spa day, to boot!).  I came home and crashed hard, and when I came out, this all had happened.  Well, the shelves had ;) Easily one of the most useful birthday endeavors I have ever seen.  There will be better photos in the future, but we were so excited this was just snapped off on my phone.  Jane was excited we had gotten a lot of our silly human things off of her table, so I did not crop the lower mess out.
We tried a new wood finish for these shelves, and I am so excited about it.  It's Varathane 3x wood stain in Worn Navy.  I prepped the plywood surfaces by sanding down the edges and better flat surface, then gave two coats of Minwax wood conditioner and one coat of the blue stain.  All six panels were done in a night, and we let them dry for a day or two before he assembled all the pieces.  The edging planks were not primed, but they were also a better quality wood and took the stain more evenly than the plywood would have.

I grabbed the 2x2s while I stopped into Ace for some refinishing products (yet another adventure, to be sure) and spent about $30 on them.  The plywood we used was technically underlayment, birch, and one 4'x8' sheet (cut into sixths lengthwise) was about $40.  The long screws and wood conditioner were onhand already, and a new staining brush and the stain ran under $15 together.  So, the whole set of shelves for about $85 seems like a reasonable cost for storage we don't have to move to clean under and nearly doubling our surface space, from 8.75 sq ft to 16.

Tuesday, January 5, 2016

Paint!

One of the other components of this project is painting the untiled walls, so this seemed like a good time to start.  We chose a combo paint and primer as the walls were already covered and a light color.  Honestly, if the paint weren’t of such poor quality and effort in here, we might not be working on the kitchen at all, so thanks flippers!
We’ve used Behr before and really enjoyed its coverage and durability.  When prepping for the tile, I scrubbed down as much wall as I could easily without getting too crazy. We have open shelving above our cabinets and it’s a stand-on-the-counter kind of situation for me to work up there, so cleaning is super fun.  I also opted to remove the outermost cabinet doors to be able to reach the entire wall.   We’re going to be revamping the cabinets as well, so this isn’t an excessive step to get it done right.  I’d recently cleaned behind the fridge (a super scary Halloween for sure, this year) so just had to pull it out and give a quick once-over to the wall.  Yes, the kitchen is a barely usable disaster, so let’s just let it go the whole way, ok?  The dishwasher stays so I don’t even care.  

While hanging out on the counter to clean the walls above the cabinets, I realized the ceiling was badly painted and that there was even wall paint on the ceiling.  I pulled out the surrounds for the can lights and realized they’d not bothered to do that, so we took it as a sign we were supposed to repaint the ceiling while we were at it.  This made me very cranky, but at least we had ceiling paint onhand from a redo in our previous apartment. It made me so cranky, in fact, that Alex banged it out because he is almost a foot taller and therefore can reach and fit more patience in than me. 
I turned around one day and he was also plowing through the wall painting.  I had been bumming about the holidays this year, and he seemed to know that getting this space going would really cheer me up.  With the exception of one night where I helped at my height, he did most of the paint over a weekend.  We chose this blue together and really liked it, but when it went up on the walls, whoa was that a lot.  We felt less color-shocked once things started to come back in for me to bake a bit for the holiday, and now it’s fine.  Apparently even I can be overwhelmed by color.


After the grout had cured properly, Alex took to the joints with sealer to prevent damage to all of our hard work.  He was extremely careful and used a small brush and wiped up drips well, because they can leave a white residue on tile surfaces.  As always, Nyobi helped.