Friday, July 15, 2016

Resaling!

So, if you know us, you know I don't like to pay much for things.  Which is a bummer, because we also like things that are nice! What is a girl to do?

She's going to scour the internet and her surroundings for the best quality she can find, and only occasionally shell out for fancy stuff.  Also, she's going to marry up.  Kidding! Alex was doing ok but not a fancy man when we met and got situated.  I assure you, can show some photos of his clothing choices.

Anyways, this place does not have great storage for entertaining, linens, multiple seasons of clothing to suit winters of -40 and summers of 90+ humidity, so we've been getting creative. After a lunch with some of the best ladies in town, I wandered on further out to a mythical resale shop espoused by Kim and Scott of Yellow Brick Home, Jubilee.  No, I didn't take Alex. Then, he would have to tell me no in person (worse for him) and would also have the ability to tell me no (worse for me). And would have taken up a whole seat in the car!

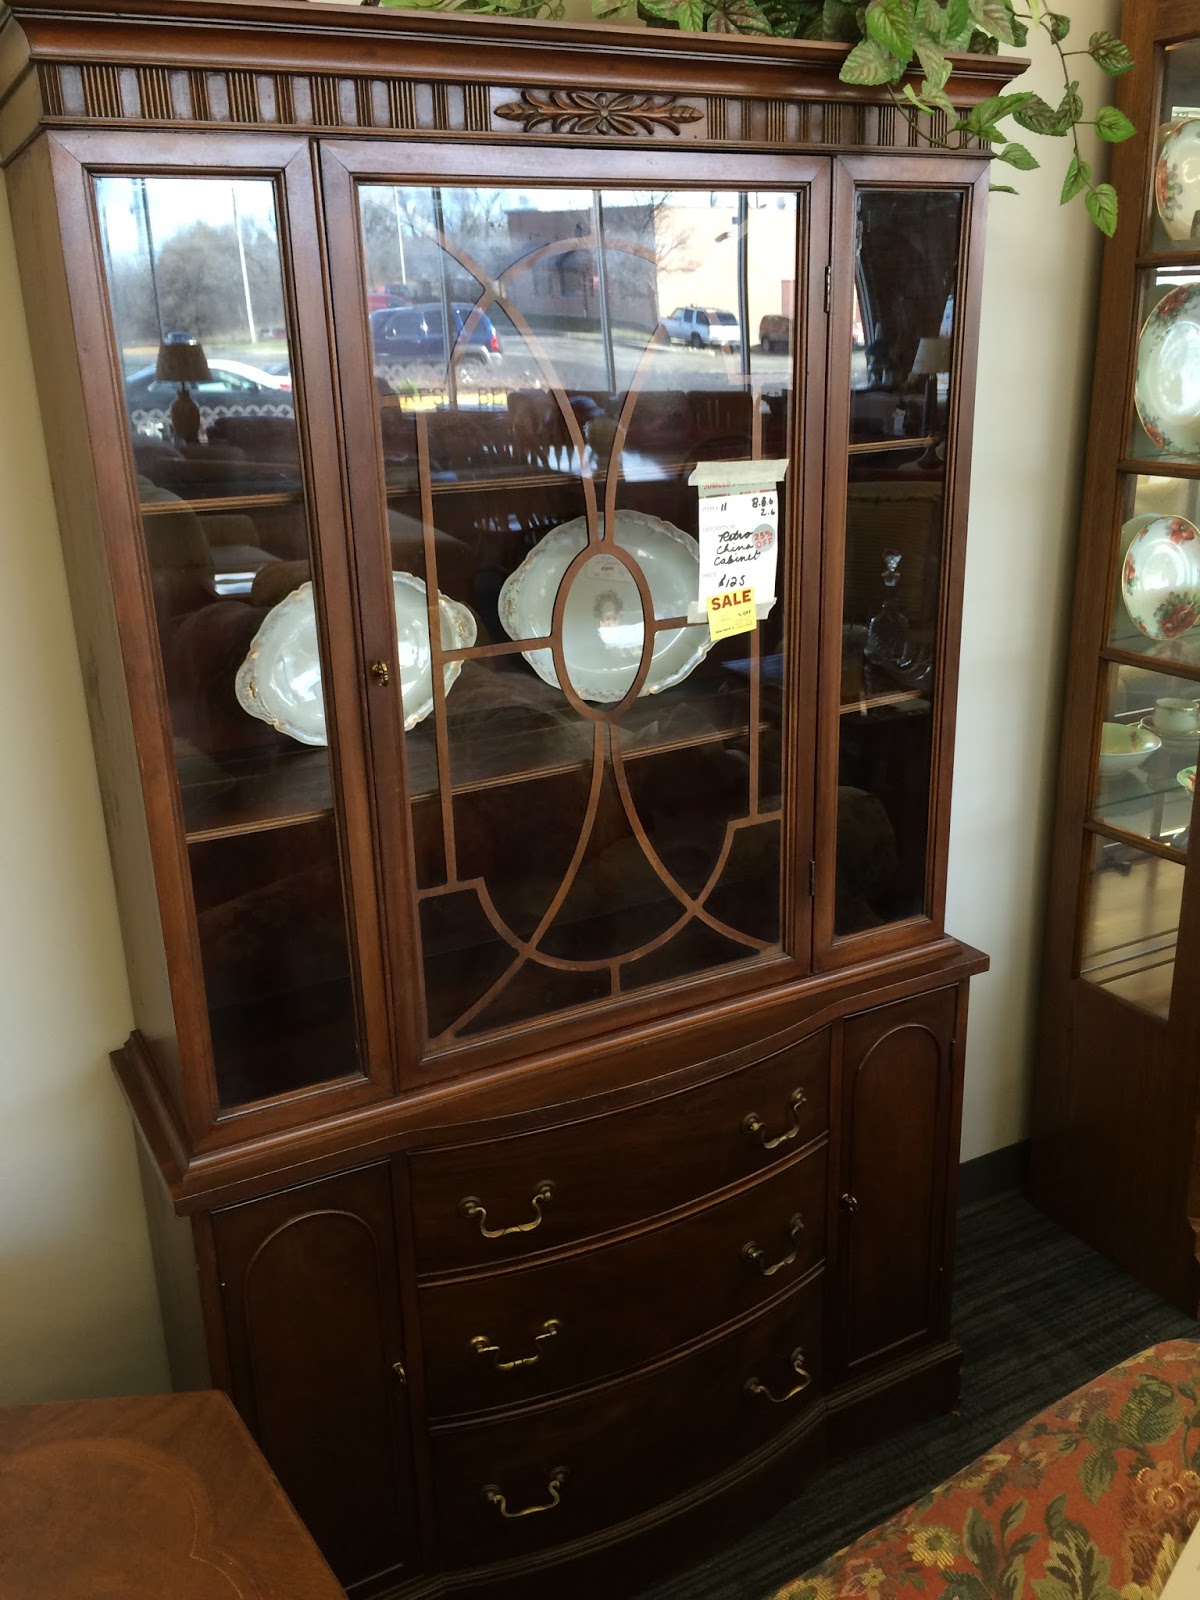
I was on the hunt for a hutch for the dining room, to help in storing serving pieces and glassware.  Our wall shelves are great, but I'm not sold on storing our wedding flutes, antique wine glasses, and just generally anything we need to drink from on a shelf that is suspended in air and has not passed its trial period yet.  I found a number, and emailed my aunt at her work address to show the photos.  RE: IMPORTANT!  She must be ready to commit me.

Anyways, I narrowed it down to things that would fit on a specific wall, and that were tall or very tall.  One of my only tried and true tips: the taller the better, for storage in small spaces.  After a lot of back and forth with my aunt for advice and Alex for final say, I came away with way more than the hutch.  Whoops!

The other things were all of good use: a wooden stepstool that I am currently refinishing to dedicate for use in our closet/for Ny to get up on the bed, two rocking arm chairs that we have been trying to figure out the future of (so comfy!!), and a sleeper sofa that was a bust space wise but worked out for our friend Andy.  However, 3 out of 4, or 4 out of 5, is not a bad success rate.  The chairs have been living in the back two feet of our garage space since March, but we'll figure it out eventually.

When it came home, I was excited like a small child with a new toy, and we immediately dismantled our older oak hutch to move elsewhere.  I cleaned out the drawers and all of the interior surfaces with a quick furniture polish - it was in such good shape, no refinishing was required.

We moved it to the intended wall, where it fit almost perfectly, because I had finally wised up and took measurements during shopping! I lined the drawers and loaded it up with our wine glasses, table linens, and dish towels immediately. The lower cabinet doors became a home for our canned foods from last summer - so much room!

We did choose to do a couple of things to tune the hutch up.  First, the upper cabinet was missing the glass shelves within the side cabinets.  I made a cardboard template to get the exact measurements for the unique trapezoidal shape, and Ny and I took it to our favorite, Kim's Clarendon Hardware.

John had the glass cut within the day, and at ~$12 for the glass and cuts, this added four additional shelves of space for wine glasses, etc.  We also picked up two bulbs of the correct size at Kim's as they had a special base, and found out that the lights in the upper cabinet were actually on a dimmer - so fancy!


I wanted to love the hutch in its original state, so much - but the hardware finally got to me and I took to the internet.  We did like the golden tone of the original with the red undertones in its wood, so opted for a deep bronze to replace the drawer pulls and cabinet handles.

As the drawer pulls were spaced 3", it was easiest to just choose a style in that size.  Ultimately, we ended up back at Amazon for these Lombard Franklin Brass pulls, which were listed as ten for $17, and added onto our next order.  We loved the first package in person, so went ahead and ordered a second set of ten and yet another for an upcoming project.

Tuesday, April 26, 2016

Grout is the worst

If we had chosen our floors, I'm not sure white tile would have made the list in our kitchen. Possibly bathrooms, but with the amount of food we have flying around here on a given day, it's hard to keep the floor looking even halfway decent.  It's pretty easy to clean tile - we have some squirt and mop products and of course a real, thorough mopping is excellent for most spills.


The tradeoff for the easy care of tile is of course its grout.  Which is the worst for many of us who are bothered by the feeling of crud, or, who live in our kitchens.  I've tried a few different cleaners of varying degrees of chemical-inclusion, and they don't make me feel warm and fuzzy inside, or in my nose, which makes me very worried for our furry girls whose insides and noses never leave and might eat something from the floor.  

Not too long ago, I found a suggestion to clean the floors with baking soda and vinegar.  No way! I thought, that's like PG-rated cleaning and these floors are not in good shape.  But then I read it again, and the poster didn't seem to be a liar, as in, she had photos to back her claim up.  So, one night, after poor Alex had sacked out, I decided to give it a go.


I sprinkled baking soda around the edges of six tiles.  The first round, I definitely overdid it, just a light covering should do it.  Then, I busted out my trusty spray bottle of white vinegar (not the cleaning kind - I feel like the edible amount of acidity is sufficient, and then can always use from the same gallon if needed), and spritzed the grout lines with vinegar.

After the very therapeutic fizzling sounds, that at least made me feel like I was doing something, I scrubbed at the joints with a grout brush.  We bought one at Target for six or seven dollars when we first moved into our last apartment and realized the water was going to leave orange stains on the white shower grout forever.


It is officially paying off, because I was able to scrub a good bit of the dirt out of our kitchen floor, rinsing the brush out periodically.  After hitting all of the tile edges, I wiped the excess baking soda into a pile in the middle of one of the tiles, and spritzed with another round of vinegar.  It would probably have been more effective to use less baking powder from the get-go, and do a couple of rounds of this.  I scrubbed down the edges one last time, and left the floor to dry to see how it looked in the morning.

I also thought it best to stop loudly scrubbing our kitchen floor, unless I wanted to write a very short follow-up post on how to make your husband ready to throw things at you because he ran around and did errands all Saturday and was exhausted while you HAD to clean something you'd lived with for over nine months.  Even just that night, the difference between the cleaned tiles and unaddressed ones was pretty apparent.

By the light of day, the difference was real, and I got to the rest of the floor over my "break" from classes.  One night, I looked at Alex and said, I need to have fun again.  I am sure he thought I was batty the next day when I'd done this (you know, as a really bizarre version of "fun"), but it felt like we might not have food crud everywhere now.  This was a fantastic opportunity to scrub the difficult spots and around the edges of our kitchen under cabinets and appliances, and also the day my painting pants died of strain.  Sigh.


When I'd finished, there was a baking soda haze all over the floor, and I let that dry and played elsewhere.  After our bedtime cat overlord feeding, I gave the tile a quick clean with hot water and a fresh mophead, and called it good enough for the day.  When we get the kitchen put away, I'll give another good mop to it and be fortified by success, ready to return to the cabinets (you know, sitting around since December....).  Also, now that the caulk is happy in the bathroom, I guess the floor looks pretty awful...

Saturday, April 23, 2016

Bano!

If you give a girl license to paint a cabinet, she will notice and redo the caulk in the room, then move forward on the wall color, and fixtures, and..... Bam! Presto chango!

Mr Alex and I considered a number of paint colors for our bathroom - exhibited in the mirror, here.  We knew it only really had to suit us, and that the brushed nickel fixtures hanging around were not our favorite things, but not the worst option available in the world.  We also determined that a tall slim towel cabinet was not a longterm solution, and that the bathroom wall cabinet was not in the best location.  This is fine, I had just thrown it up there when we moved in so things would have a home, and knew it wouldn't live there forever.
So, I took the cabinet down, stored it in the living room (classy!), and had things everywhere.  That's how we knew it needed to go back up.  While Alex was away seeing his other wife in Austin (aka business travel), I took to the walls.  I removed the fixtures, all hung with anchors of varying types (including a pair intended for concrete? that held up a four-inch glass shelf), cleaned the walls, slapped up some patches and painted our bath.  We chose Sherwin Williams Spa, in Behr Paint and Primer in semi-gloss, and it is gorgeous in our well-lit, small bath.  In bright light, it's a cheerful blue, but in low light and the evening it's more sea-colored. The teal is a perfect complement to our subway shower, as well as our Sea Salt cabinet, and closely related to the ceramic knobs we added. Basically, as close to one of those beachy bathrooms as one can get, without adding seashells because we have real things to store in here.

I was able to pull this off in an afternoon, as this type of Behr can be recoated in two hours.  I rolled most of the wall space, let it dry and stuck the paint tray and roller in the fridge, then painted the trim with a sweet little Wooster shortcut brush (fantastic for ladies with small hands) and rerolled at the two hour mark.  I did recoat the trim above the shower so we could resume normal life activities, but left the rest for when we know what is going on in here, someday, someday, someday...
Alex tested out his new tool belt while rehanging our wall cabinet and fixtures for towels, etc.  He estimated it made him five times faster because he was able to move forward without putting things down and needing to find them again.  The struggle is real.

The remaining plans involve adding shelves for odds and ends, and possibly updating the light fixture to something old and cruddy that should be loved for what it is.  Or something new that serves us better than the builder-grade mirror and round globes even my grandpa thinks are "dorky."  His words, not mine.

Friday, April 8, 2016

The Ugly


Well, it's not always sunshine and roses and happy midnight paint parties here.  Sometimes, nasty projects like replacing the old dried caulk need to happen.  This is the story of how much I hate that.  The opposite of a love story.

While working on the kitchen, removing caulk from around the countertop and sink was a fun Friday night that Alex hung out with some friends, and I was totally fine with that.  It was at a comfortable height and the surfaces involved were a single slab of granite and drywall. So much easier. I found a product made by the folks of Goo Gone that is a caulk remover.  It is not extremely noxious, and not evil to the planet, and Nyobi and I found it at our hardware store for less than $10.  For three rooms that have plumbing, that's fine. It was best suited to the dried up seals around the sink and faucet, so definitely paid off.

The bathroom project was made apparent to me while I sat on the floor to paint the cabinet, and realized that the seams between the floor tile and cove-shaped baseboard tiles were caulked and it was not looking nice.  It was also a great time to observe that the flippers had painted the grout on top of the baseboard tiles gray, sloppily, as well as everything else in this place, and ratcheted up addressing this highly important area of our home as quickly as possible.  Studying, who needs that?

Once physically loosened, the GG made the work easier and has actually cleaned up some spots I have been unable to address on our floor since moving in.  Um, what was going on in here anyways?  I also bought a tool for this purpose, but was unable to find it because we live in a high-traffic, low sense of putting things away home/work environment.  I did find it and will be able to use it for the guest bath, which is on the caulk radar for sure.

So, a tool like a utility knife, with a nice sharp blade, and a "scraper", or razor blade housing, is the best friend for a project like this.  If it's possible, give a good slice to both edges of the existing caulk line with the knife.  See if it can be pulled out at all.  After you have pulled out 2" of caulk, usually all that behaves at once, you can use the razor blade to scrape the tile surface and remove the remnants from both sides of the joint.  It will be so fun.  You will be so happy you decided to do this. 

The GG spray can come in when you have caulk that does not want to be cut loose from its surface because it has dried up and is awful, and you can let it work for a bit then repeat with the razor blade. You will want to have more than one razor blade, and also the removal tool has a hook on one side to pull down, through, and away from the joint.  Over two afternoons (and evenings...), I removed from the three walls, the sink, the toilet, and also the edge of our bathtub.  Also I hate our bathtub, and that it had so much caulk on it for a reason I do not understand.  It's important after removal to clean the surface thoroughly, and walk away and let it dry fully and get your irritation under control.

If a large part of why you're redoing the caulk is that you cannot stand the current hodgepodge of colors and attention to detail, you need to do these things right or you are no better than the last.  I am not at all convinced anyone else will notice these things, but that's not the point - agewise, it's time to be done in a best case scenario, and I am not certain of the quality of the original job anyways.

In a very, very short summary of what to look for in caulk, there are silicone based ones, latex based ones, and mixtures of the two.  Silicone should be used in areas that would receive lots of water, latex ones should not.  We cannot have too many products floating around, so have limited myself to a clear silicone and a white latex. The latex is paintable so I have used it in areas like where the counter meets the painted wall in the kitchen, where we shouldn't have liquid but probably will because I cook like a crazy person.  There are cheap versions and good versions.  For how awful this process is, I, and many men on youtube, think you should get the antimicrobial one that is supposed to last ten years.  It may not, but the longest time you can possibly get out of this endeavor should be your goal. For the kitchen and bathroom sinks and our toilets, I chose a clear silicone that is going to be the death of any moisture trying to find a new home under our home.  If you are doing painting projects, there is a much less expensive latex caulk available, and we can talk about that when I am doing one of those projects.

There are a number of tools and contraptions that can be used to help smooth the "bead" of caulk, and I am not an expert or anyone who has done this in a paid environment, but I think they're only useful so far.  The best trick I have learned/seen is to use painter's tape, blue or green or whatever color of the rainbow you love and don't care about, and to create a guide for the caulk with two sides.  It is important to take care to not make this too wide, and my method is not great because I end up letting it dry and repeating the process multiple times because I am afraid to screw it up with too much caulk.  After a short dry, you can wipe up the excess not in the joint with a wet sponge, or use your finger dipped in water to smooth the line.  If there are gaps, I would rather go back and fix them after a bit of drying when the tape has been removed, but you are your own person and I am a fussy girl.

Or sometimes, I want it to be done before I go out of town, and bang out two walls so Alex could theoretically resume showering in here if he chooses.

If you made it to the end, I reward you with a silly cat picture.  In a poll of our readers, exactly one person expressed an interest in more cat pictures.  It was myself.

Thursday, March 24, 2016

Bathroom Cabinet


Hey guys, we've been hiding out, mostly because we can't get a ton done every week.  There's this pesky work and studying we have to do, and it's a real drag.

I popped into Sherwin Williams on a day I was erranding around like a crazy person, and picked up a quart of cabinet and door paint, ProClassic Interior Acrylic Latex in Sea Salt,
a near-white that had a lovely green-gray tint.  Some bad things have been happening to our kitchen cabinets, like being used, and I wanted to regroup on the paint I thought we could use for them because something or other has not held up and the paint/primer needed to change before the top cabinets could be attempted.


The bathroom cabinet is just a pair of the same cabinets in the kitchen, so it was all of the same effect with none of that pesky finishing the initial project result.  I researched a lot, and decided to trust in the knowledge of the internet and NOT sand the bathroom cabinet down.  This means I could do it in the middle of the night!  A time I am not booked by any outside entities or needed for human interaction with Alex or confined by the concept of decency to neighbors.

I scrubbed the cabinet doors, false drawer fronts, and frame down with no-rinse TSP to get any speck of grime off, and let them dry well.  I have a dish brush set aside especially for this that fit into the grooves on our doors.  Then, I laid them out on the dining table.  My grandmother would not have minded, that woman did all kinds of projects on the table including gallons of poly.  I met them.  Also, I used a drop cloth, so it's fine.

I primed them with Zinssner 123, which I now love because I read you can recoat after one hour.  One hour?! That's so much faster than four.  I got a real leg up on time management in this project, even though the shop should not be open that late.  Both coats of primer did not happen in one night, but it was very exciting to know Jane's window to ruin my work would not be nearly as long.  The painter's pyramids came in handy here again, as I was able to do both sides and walk away so fast.
The cabinet frame was a little trickier, because I could not remove that to the safety of another room.  So I had to be quiet and not let my X Files viewing bother Alex, who has a real life and places to be.  I only have places I should try to be, and things I should be reading, and things I should be studying, but that's for the next day's Jenn to worry about.

I followed up with one coat of paint per day, because I do really try to do those other things I discussed.  This lovely man put the hardware back on and rehung the doors, added soft-close hinge adapters (purchased with kitchen cabinet supplies) to the doors, added new knobs, and added tip-outs to the drawer fronts, and I did a bit of patching and touchup.  Then, Alex went to Austin and I let the paint cure.

Overall, this was an extremely fast test project.  The paint was around $20 on promotion at Sherwin-Williams, the pulls (six, including two for additional storage we still need to determine) were $4 each, and the soft-close add-ons were in the large package of 25 we purchased for the kitchen, about $3 each.  The  whole thing came in around $50, and we have a less noisy, cluttered sink area to make our mornings (and nights!) a little smoother while seeing how we feel about the cabinet paint.

Over a month later, we're quite happy with the cabinet and door paint's durability, and I am quite ready to get back in the kitchen and wrap it up for good!

Monday, March 21, 2016

Living Room Joy

We moved around a lot the first five years we were a unit - three apartments before we were ready to buy.  It was very apparent that we would not be staying in any of them for long (too Pittsburgh, too pricey, too awful) and so we sat on a lot of things we didn't hate, but didn't love either.  One example is a brown and blue rug that we bought six years ago in Pittsburgh, when we were engaged.  It was an indoor/outdoor carpet, and suited our needs in the subsequent apartments well.  We got here, and knew this was going to be our home for the next five years, minimum, and I knew that I was over the rug.

The Kon-Mari method, detailed in the Life-Changing Magic of Tidying Up, has been working for us in some areas, like clothing.  We're not people who buy fancy clothes, and I buy a lot of mine in resale and consignment shops, because I hate waste and these are in reasonable enough shape.  Meanwhile, Alex is a fancy-man, and by that I mean we buy a bunch of decent (mostly non dry clean, definitely no-iron) clothes for him at a time and go with that.  I would rather buy some fruit with our dollars.  So, my sweet husband read about Kon-Mari, and we suddenly had a space-cleaner here.  Which is great!  But he advanced from his well-selected clothing to things, and I am still stuck on where do I put these laundry supplies so that I don't lose it later.


And in the living room, all cooped up this winter, I knew the carpet had to go.  It was too dark, and our more recent sofas (by the showrooms of Craigslist, thank you very much) did not exactly cooperate.  We'd purchased a smaller, lighter rug, at the people's store of Target, but the cats.... let us know how much they liked it.  So it did not go back out when we moved here, but the blue did and I remembered how much I did not want it for the living room.  We discussed buying one, and searching resale, and new cat-friendly materials like FLOR tiles and sisal, etc.  But we're frugal.  And there's really not anything wrong with the old one, other than not working anywhere like I want it to.

I realize how difficult I might sound, but I was just over the brown-blue, and I finally told Alex, that I had to Kon-Mari it.  "IT IS NOT BRINGING ME JOY."  I think he understood then.  We found one that mostly fit the bill at Costco - which happens to stock indoor/outdoor rugs every year after Christmas and is where our last one came from.  We didn't pull the trigger, and then when my mom was in town after a small surgery (carpal tunnel, and she is fine now) she and my brother and I went to Costco.

Also, my brother and I are not really allowed to go to Costco, according to his person, but that's too bad, because I have a car and we have weekdays free together, sometimes.  So I found the rug, which was on sale (at Costco, that's like the lottery!) and had my cash money ready, and my mom sweetly offered to buy it for my upcoming birthday.  I felt a bit funny about it, and mulled it while Trev and I found lots of other things we had been meaning to find, and then Alex gave the thumbs up on the rug and I let her buy it because the year you buy a home is so freaking expensive, it's not funny.

We went out carousing for pizza and beer (I had a salad and only a little pizza) and came home, then after she left Alex and I put it out.  It is a little narrower than our previous rug, and I love it.  A few weeks went by and we went to a local carpet shop and had a carpet pad cut to fit under it, for a whopping $5 per square yard - and it is puppy and animal slave heaven, so cushy and lovely.

Of course, if you give a girl a carpet, she will probably want some curtains....

Saturday, March 12, 2016

Making orchids happy


Historically, our home has not been a great place for plants.  We tried container gardening one spring and summer, and again the following year, but Jane mostly just wanted to play in the pots while they were inside.  The past few years have only really involved herbs in our lives, until this year with some pepper plants and tomatoes on the deck as well.

 
This summer, we gave orchids a try.  They were just the normal potted kind from Whole Foods, but I was able to keep a number of them alive and have had some for over six months.  If you are not so great with regular maintenance, orchids might be a good plant to try - they take 1/4 cup of water once every week or week and a half, and are absolutely gorgeous when they bloom.  People think you know what you're doing!  Most recently, two bloomed so full their containers continued to tip over and spill their bark, perhaps with some cat-sistance.

I finally roped Alex into going to the garden center with me.  He really ought to go so I don't buy 37 pots of ridiculous scale and colors for our tiny home, but sometimes your wife drags shopping out because of her inability to decide so errands seem more like torture. Also, everything might end up pink and/or neon bright if he doesn't.  We chose some gold colored pots for the living room, and were happy to find a metal option that would not break if it were Jane-d off the sill like many a clay pot has... 
We learned a bit about orchids from a very helpful man in the greenhouse at Gethsemane Garden Center.  These beautiful plants naturally grow on trees in the jungle, with roots extending around the branches to anchor and obtain moisture.  Hence, the plants don't need to be planted in dirt to receive nutrients, instead a bit of mossy potting mix is sufficient, and bark can be added.  So, basically a great fit for a Jane-home, as she doesn't have much to dig in.  To repot the plants, an only slightly larger container is needed, as it just needs to have some breathing room for the roots, and not much water around.  The environment should really be mostly dry, which is why special orchid pots have ventilation in their sides.  We didn't ultimately choose those, but there is still lots of time left for me to pick up ones I liked at the Home Depot...


When removing the plants from the old container, it is best to wait until the plant is not in a blooming cycle.  I totally disregarded this rule, as I had the supplies, the knowledge, and wanted to get something productive done while Alex was away.  It is important to maintain as much of the live rooting as possible, but ok to remove parts that are dead.  Also, to trim off dead stems.  You can test either by snipping off a small part to check for a green center (wick), and sometimes the dead parts will just pop off.  It may be easier to cut the previous container if the roots have grown around it, and it's important to untangle roots that are shaped like a sphere or with a hollow in between - this would be formed around a tree branch in nature, but there's no such stabilizing structure in a pot.


The plants were actually repotted into smaller plastic containers that I placed inside the pot on top of a layer of stones for drainage.  If we need to repot in the future, we have room for larger ones to fit as well.  I also added stones to the bottom of the plastic planter to help with balance - orchids can become quite top-heavy - then the potting mix around the roots and finally some bark on top to break down as needed.

After everything is stable in the base of the container, it's necessary to stake orchids, as their blooms become quite heavy for the slender stems to hold up.  I had a few bamboo stakes held over from last summer, and just used those in the pots.  They were inexpensive, I think $2-3 each, and I actually scored and snapped long ones in half with a sturdy pair of garden shears to fit some of our pots.  Most orchids come with miniature claw clips anchoring them to a slim stick, but the bamboo is sturdier and taller which is probably necessary if the plants are large enough to repot.  I've also been short of clips and just tied them up with several loops of thread.


While I had a drop cloth down and dirt on the dining room table, I decided to repot other plants that were around our place.  We had a few that were in a larger container that needed more room to continue to grow, and one that had already earned its own pot and needed another upgrade.  I ran short on containers, and removed the handle from this basket for a tentative solution - it has a plastic liner, so I could remove it and spray paint if I really can't stand the wood tone any longer.